 In this project reclaimed cardboard is used to construct self portraits. The cardboard image and structure emphasize the importance of reusing and recycling materials and should provide an inspiring example of creative thought and innovation through repurposing materials.
Mission: Self Portrait
Develop a self portrait using an image of yourself, a word that reflects who you are, and cardboard. Any photo that shows a true likeness of your face can be used. A sheet of cardboard will be your canvas. The goal is to use a subtractive and additive method to develop a portrait using the layers of corrugated cardboard. The finished portrait should be a minimum of 11 x 17 inches. You may go larger.
Project Description/Outline:
- Begin with a photograph: A digital file will allow you to enlarge the image to fit your canvas. It will also allow you to add and compose text digitally.
- Prepare cardboard canvas. Sized to be fit with the chosen image. It is critical to have all image corners at 90º if you intend for the frame to be a true rectangle or square. Note: I usually refer to 90º corners as “square”.
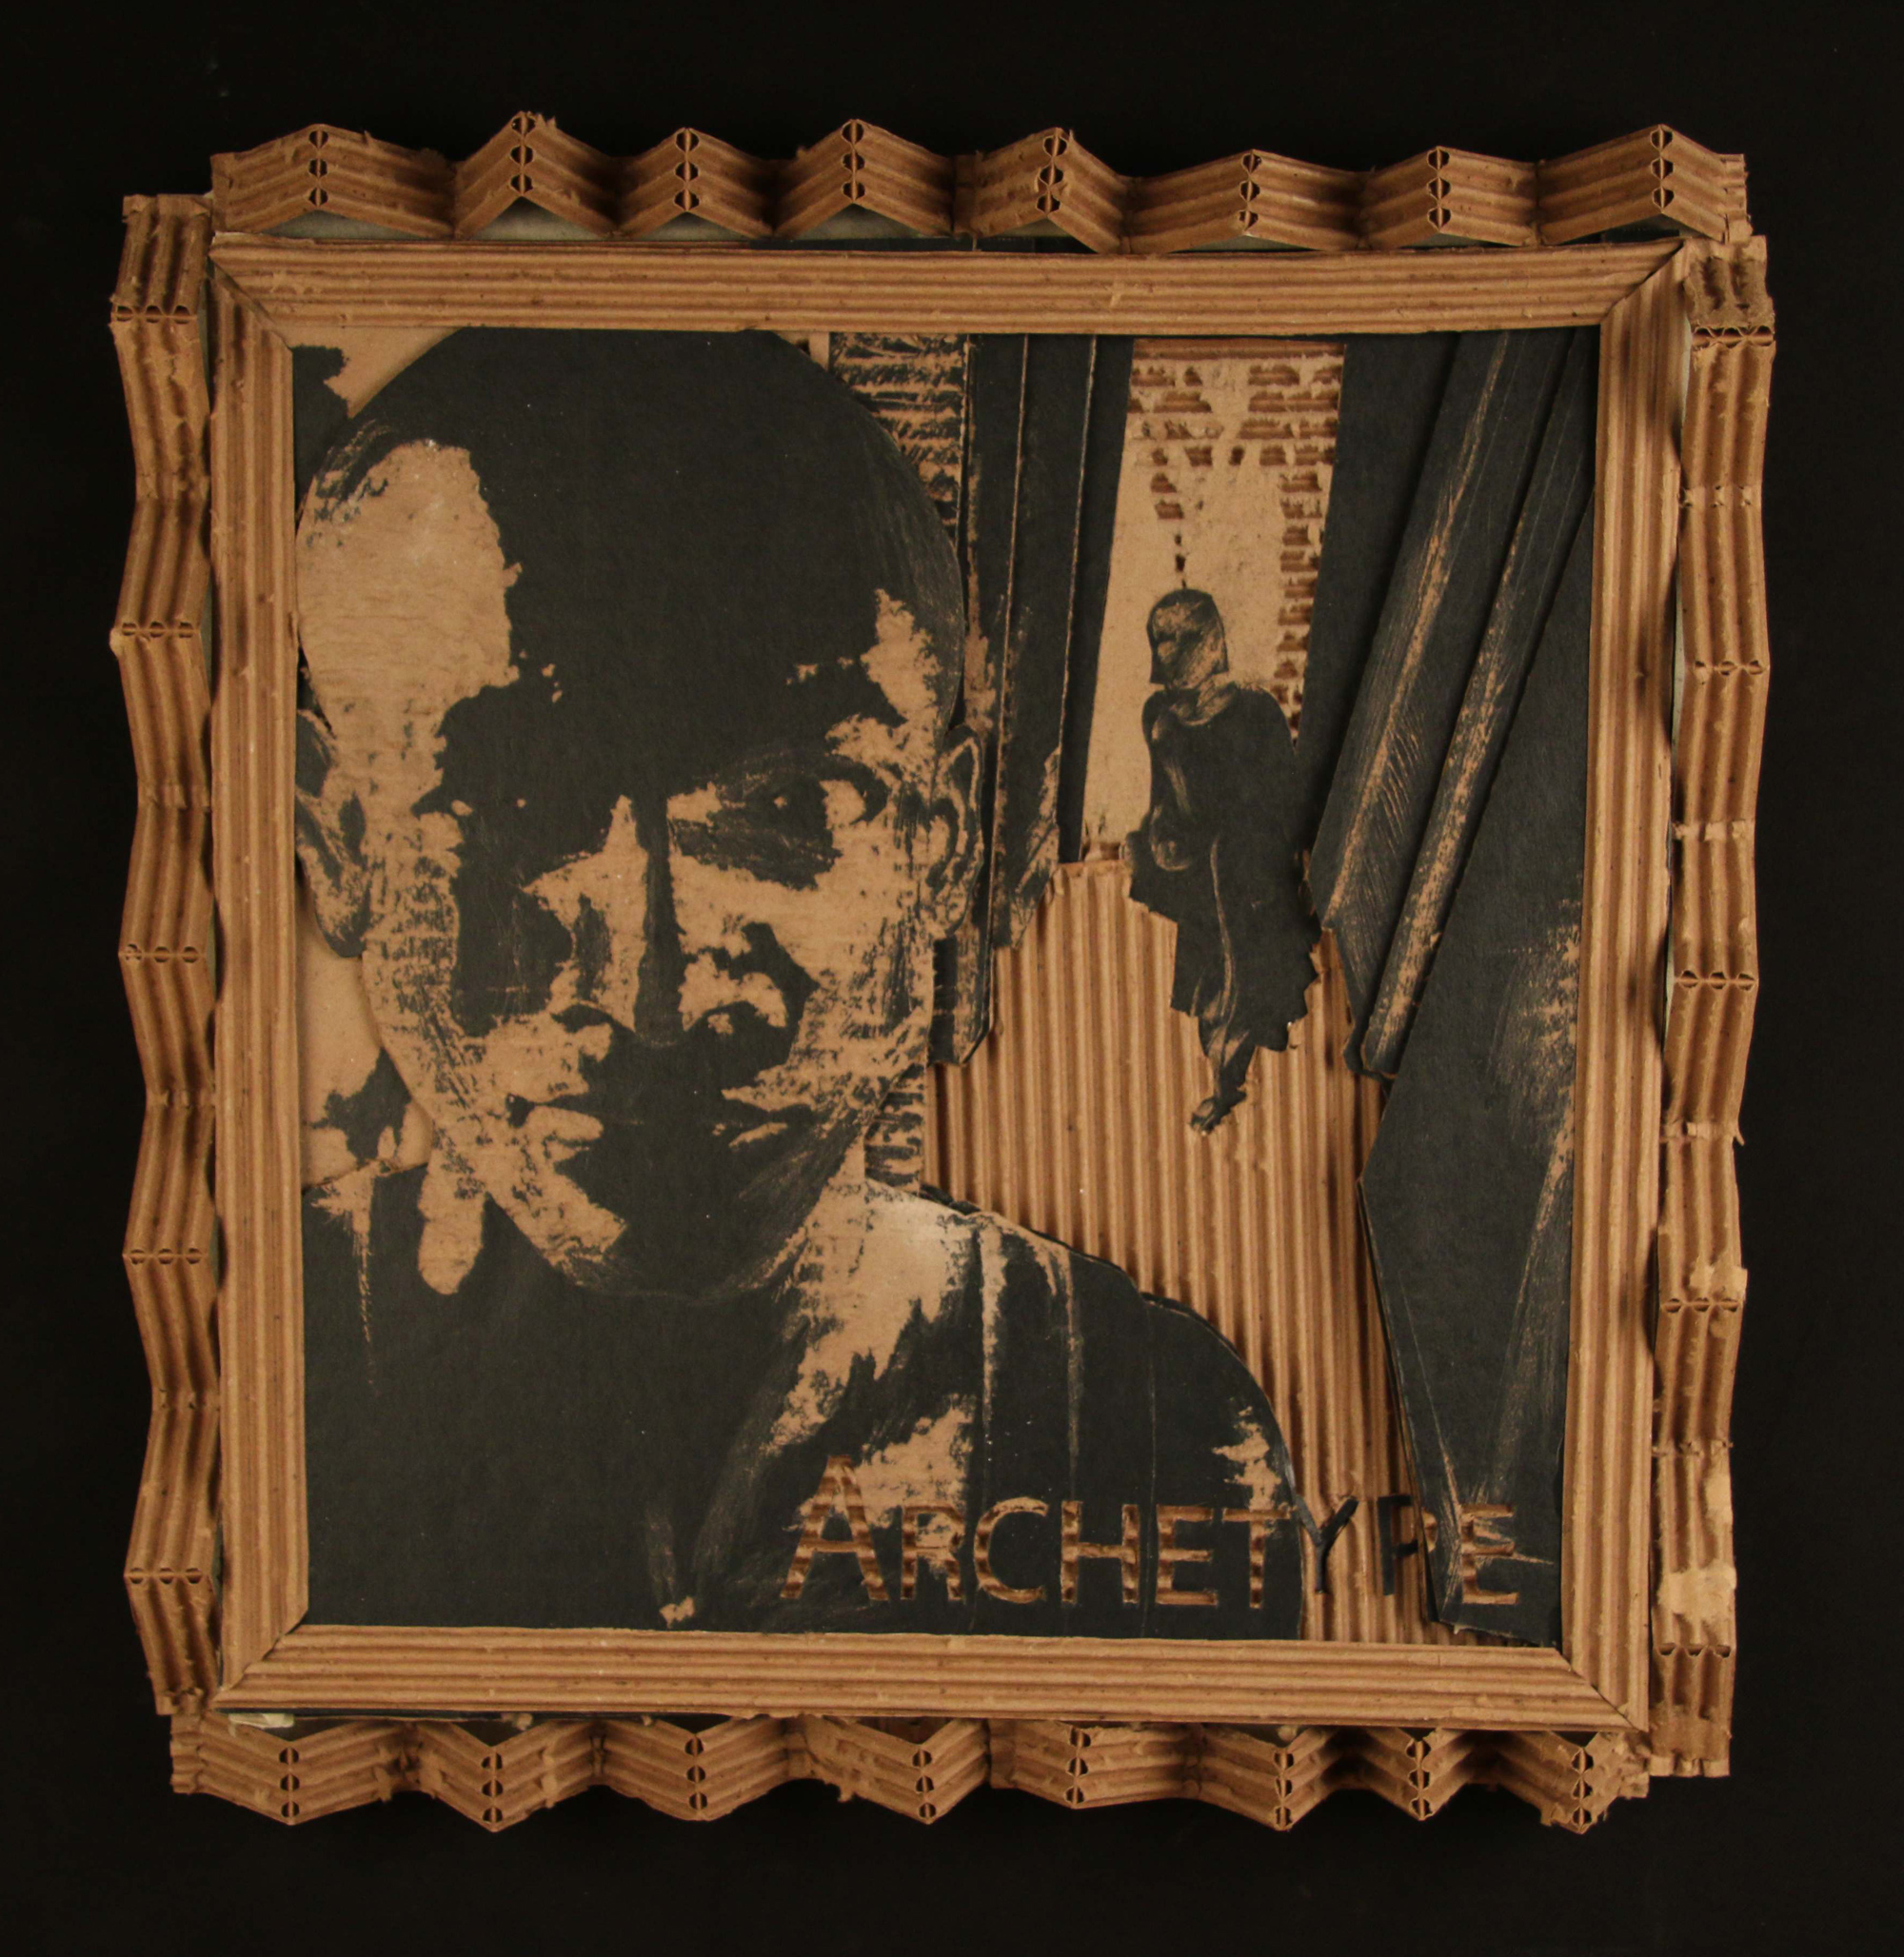
- The image should be altered to black and white. This should be done to a point where the image is made up of positive and negative fields (areas). The average rendering can be made up of very little to no gray areas. This can be done by drawing or tracing the image paying close attention to these areas. You may expand the pallet to include multiple layers in accord with varying degrees of grey. Note: the image above has Three layers to develop the image: black, white and an exposed corrugated layer. Explore the possibilities. *An alternative to this “hand and eye” design strategy is to put the image in photoshop and alter it to black and white and then the “Threshold” settings can be altered to get the image to your preference.
- Choose a word and font that best represents your personality. Develop them into your composition. The word or words must be at least seven characters.
- You will need to enlarge the image dimensions to the appropriate size.
- After a paper composition has been produced the image will need to be transferred to cardboard. Lightly mark the areas that separate positive and negative sections of the image. If you plan to strengthen the image quality with your own aesthetic this would be a good time to do so.
- Once transferred to the cardboard the image is ready to be developed by cutting, tearing and sanding away either the negative or positive areas. It may be necessary to darken the negative areas or pencil marks so they can be seen better in production. Your final image should have no pencil marks.Tearing and cutting away dark areas usually works best. What other methods can you explore and develop?
- Finally: Create a a frame of cardboard around your cardboard Portrait. 2 inch thick minimum. This can be done by layering strips of cardboard to create a thicker board. It is a good idea to experiment and create these strips/boards well in advance so they are ready when you are ready to complete the project. Be creative, What can be done to make the frame more interesting? Note: Exposed corrugated layers should be used as the face of the frame structure. The method demonstrated in class functions more structurally and can create an unexpected aesthetic to the project as a whole.
- Craft is important: Cuts and joints well executed. Clean up glue and pencil marks.
NOTE: Please refrain from cutting on table surfaces. Use a matt of cardboard or other material if you use the table. The floor works well to give one space to work and cut without damaging the table surfaces.
Research:
- Low Relief
- Rubber Stamps
- Negative and Positive imagery
- Cardboard: Material Properties
- Texture by Exposing layers
- Stencils
- Screen Printing
Tools and Materials:
- Utility Knife
- Exacto or Hobby Knife
- Cardboard
- Card board paper
- Pencils
- Graphite
- Adhesive (wood glue)
- Masking tape
- Transfer paper (optional)
Objectives:
Materials Characteristics:
- Cardboard: Flat surfaces
- Card board: Lamination
- Laminated Layers
- Skin
- Corrugation (plains and patterns)
Concepts:
- Elements of Design
- Principles of Design
- Composition
- Texture
- Pattern
- Unity
- Balance
- Relief
- Sensibility to form:
- Representational Forms
- Abstract Forms
- Non-Objective Forms
Methods:
- Technique
- Cutting Safely
- Thinking from 2-d to 3-d, layers
- Organizing the surfaces of a corrugated cardboard plane to alternate between textures.
- Developing Craftsmanship
Note: Use only Cardboard and Glue. No crayons, paints, chalks or inks. Factory pre-printed or pre-colored papers are fair game.
Create a label for your project with these specifics:
- Name:
- Dimensions: HWD
- Materials:
- Year Complete:
- Course:
- Tape your label in upper right corner of the back of your project.