Mission:
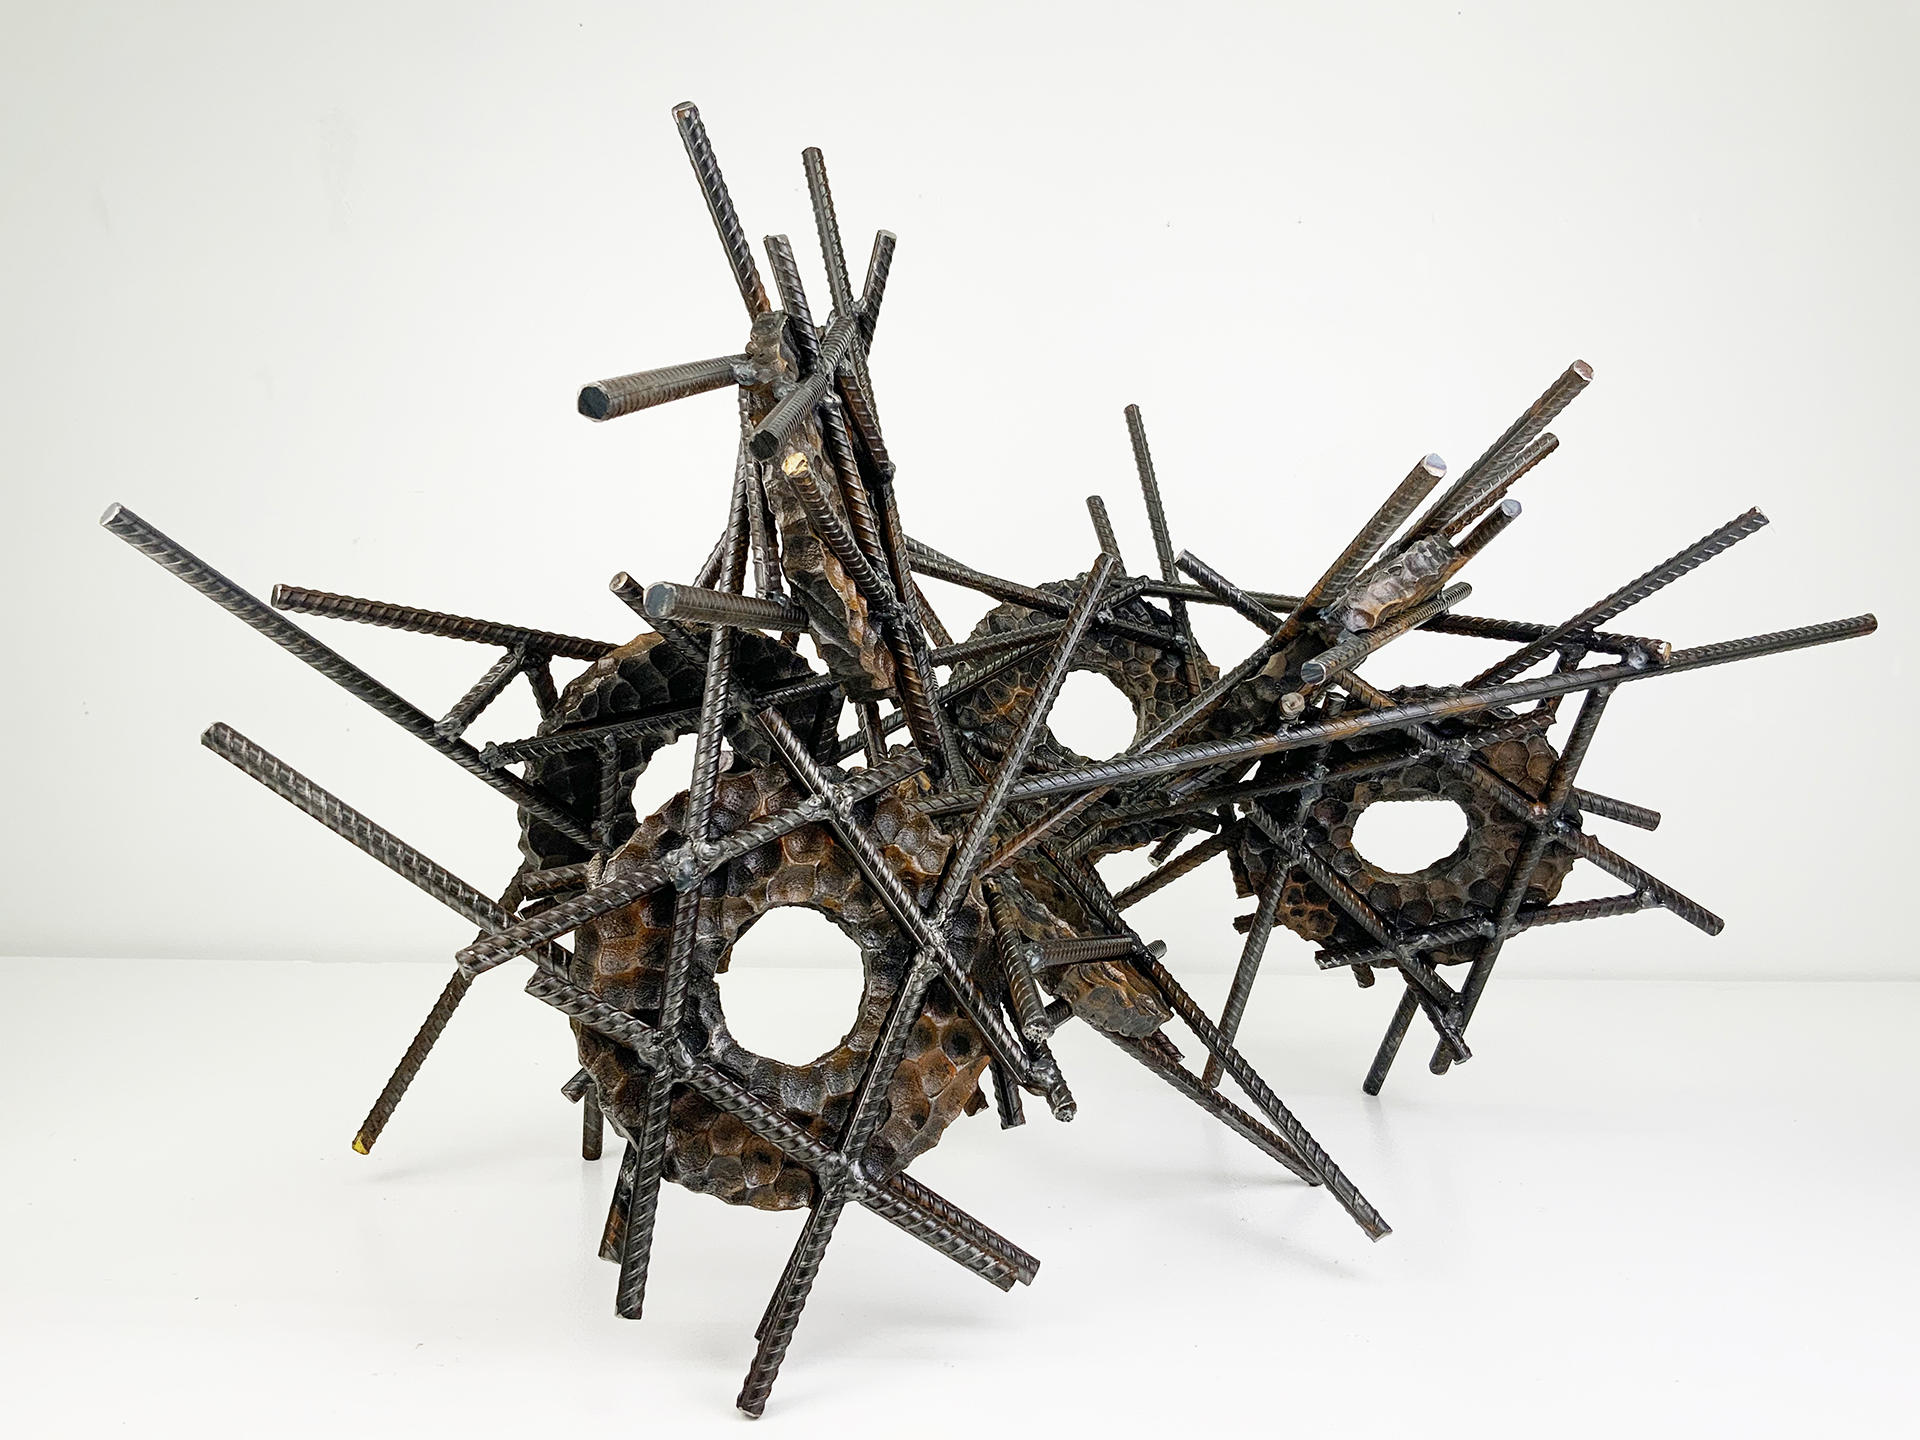
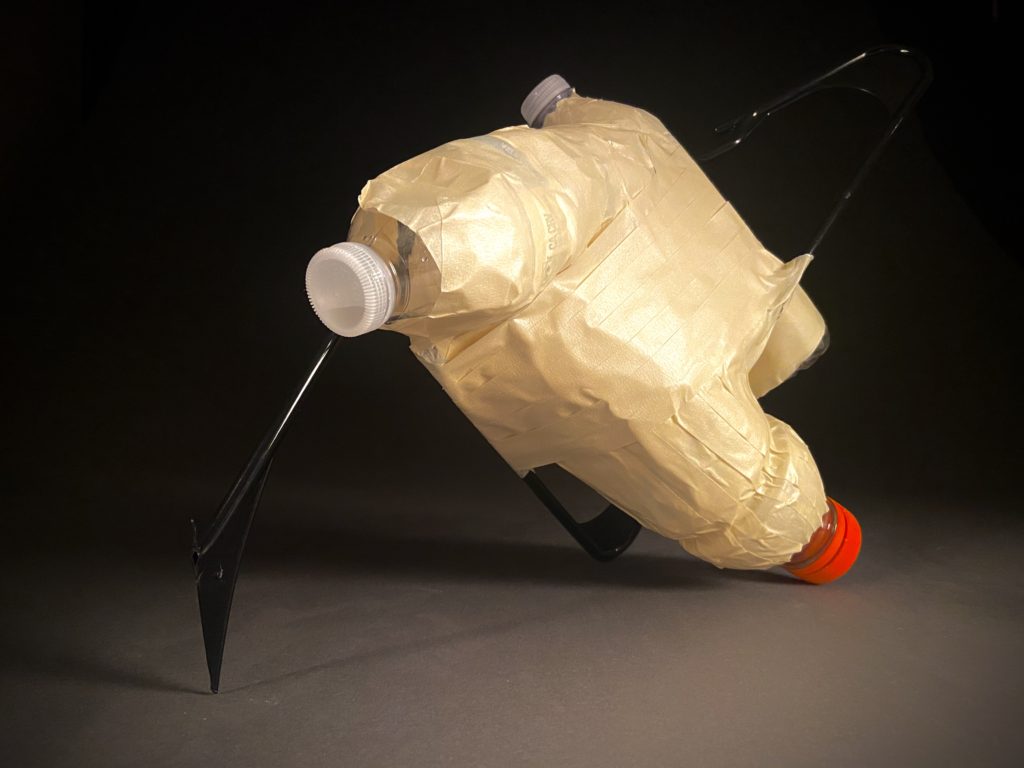
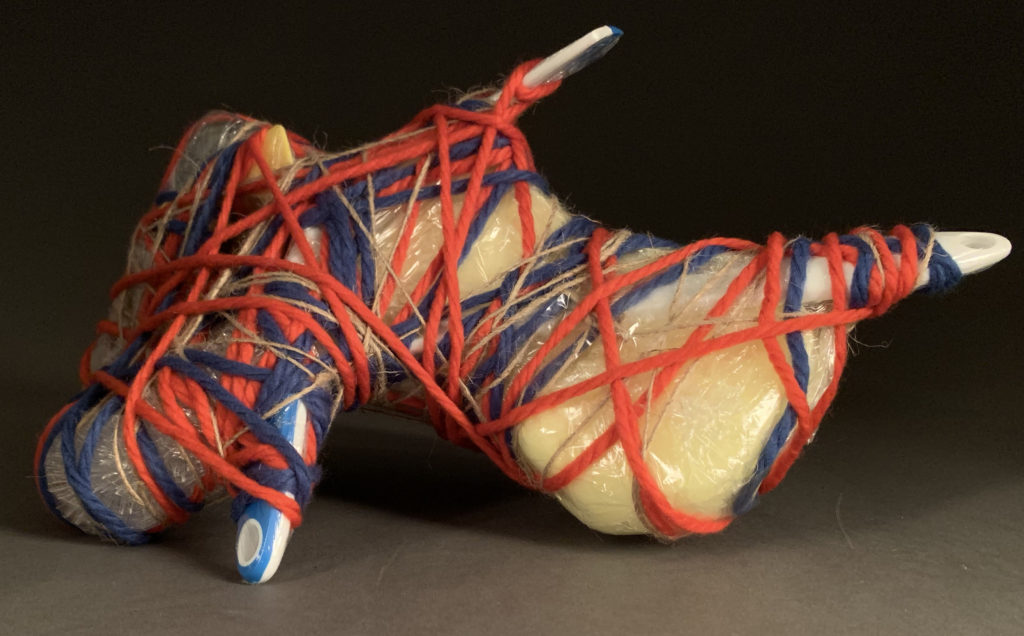
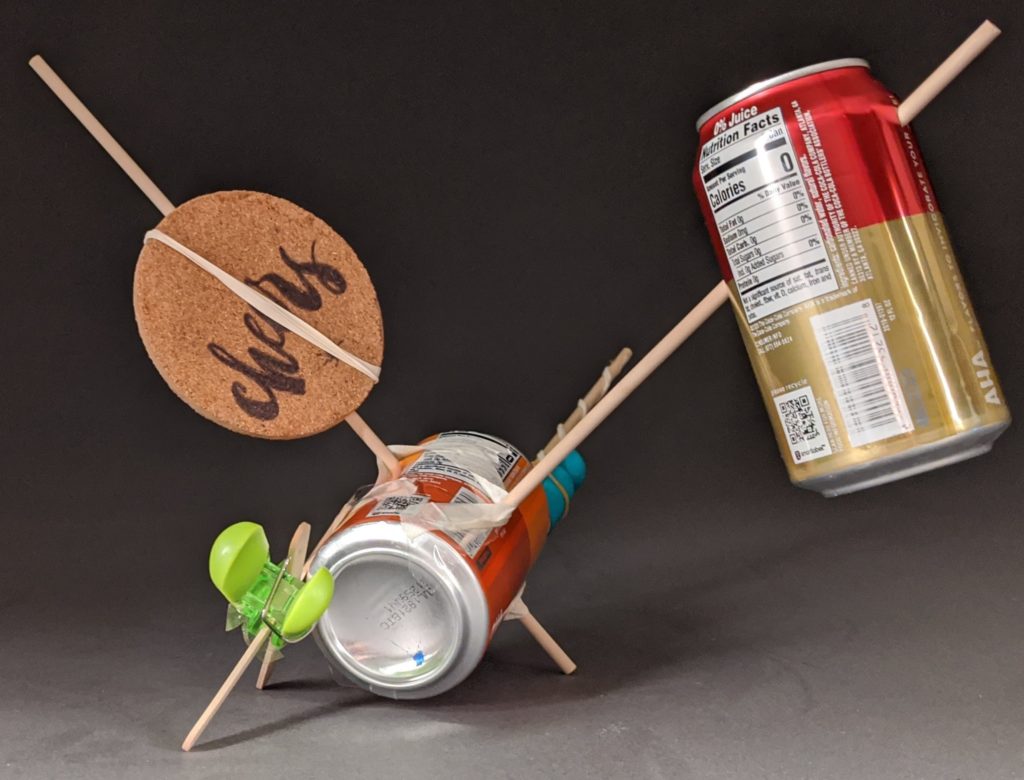
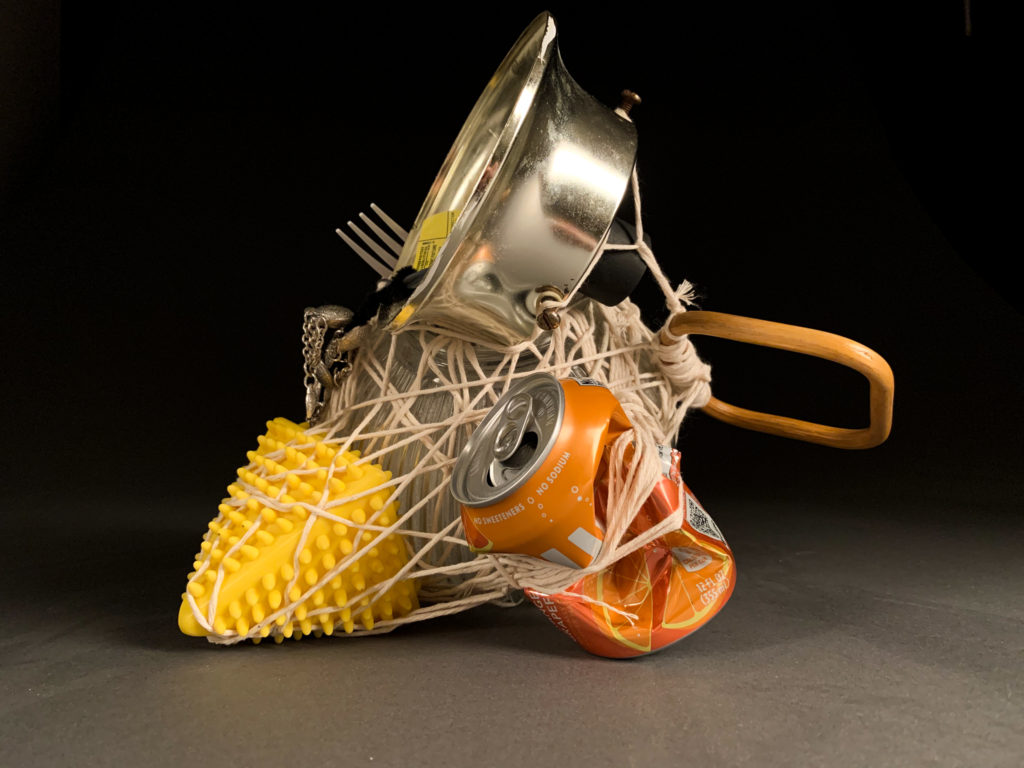
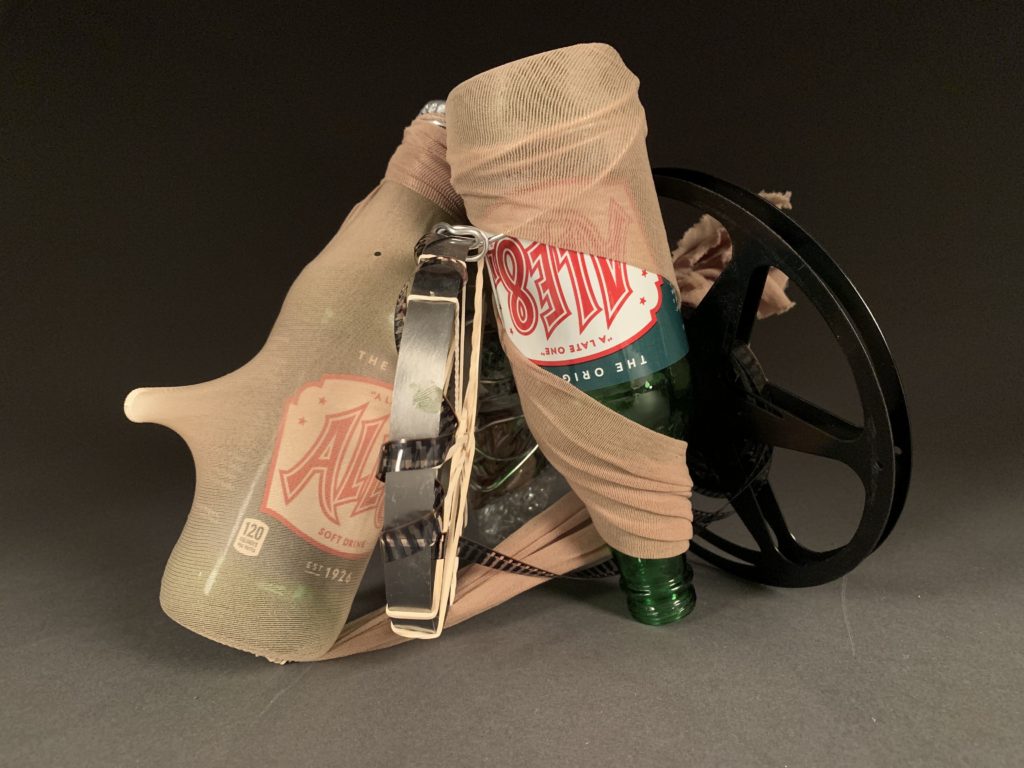
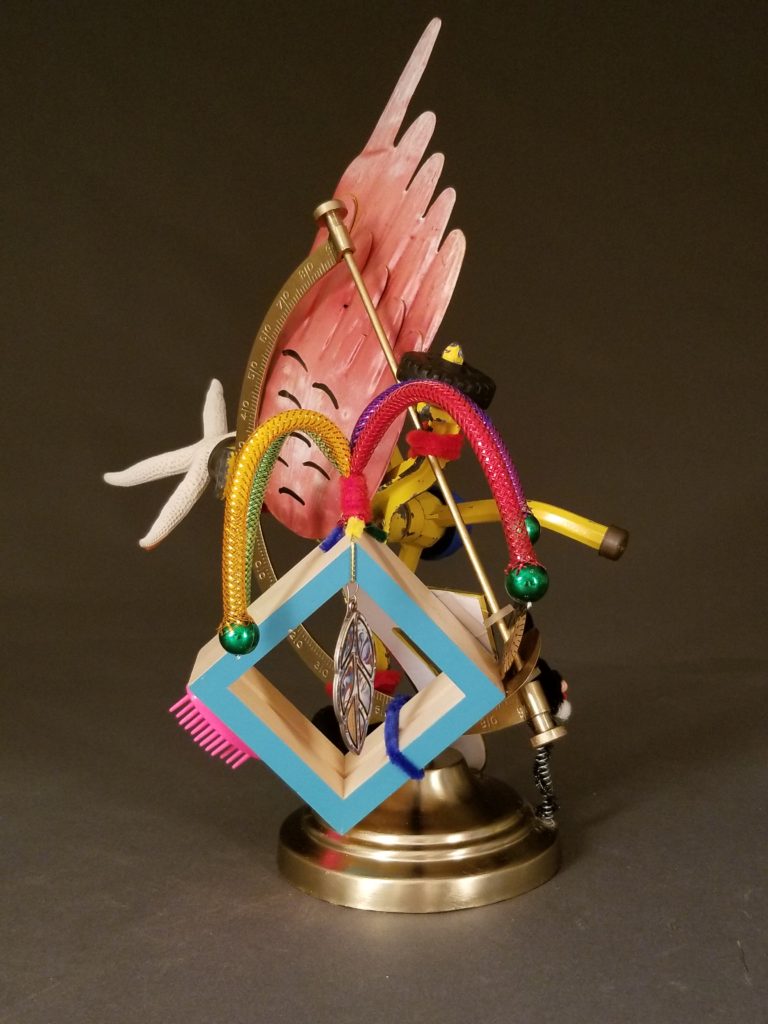
Group and bind a selection of objects and materials together. Wire, string, or other linear materials may be used to bind your selection into a dynamic form. Do whatever it takes to make your form hold together. By wrapping, screwing, and tying the objects together, the forms will become one non-objective or abstract armature. The form may reveal the selection of objects or you may take it to the next level. Encapsulate the form in the binding material.
Tools and Materials:
Found Objects
Binding Materials
Option: Skin Material: Obsessive Binding
Project Objectives:
Objective 0: Set up a folder for this Project:
Objective 1: Find Objects:
Objective 2: Grouping/ Composition
Objective 3: Binding, Assemblage, Fabrication, Structural Integrity, Stability
Objective 4: Documentation: Format: Jpegs
Objective 5: Image List: Google Doc.:
Research:
Article: Link: Fiber Artist: Judith Scott
Video Assignment: Art 21 Video: Link: Creative Growth Art Center in “San Francisco Bay Area”
Research:
Elements and Principles of Design and other terms: The Elements of Design: line, texture, shape, light, form, space, time… The Principles of Design: balance, proportion, rhythm, emphasis, and unity Exterior vs. Interior, Primary and Secondary Contours, Positive & Negative Forms, Static and Dynamic forms and surfaces
YouTube Demonstrations:
The following Demos are from a previous project, Armature Skin. It has many similar components that use additional objectives. You are welcome to use any of these additions to create your form. Sometimes forms need more and sometimes the artist will have to determine when the form is complete. Take in-process photos at times when you make major shifts to your forms. Record this in your project folder as process images.
Demo: Armature and Skin: Objective 2: Grouping
Demo: Armature and Skin Objective 3: Skin
Demo: Armature and Skin: Objective 4: Bind
Project Objectives: Expanded Process:
Objective 0:
Set up a folder for this Project: Name the folder: Project 1_your last name. Note: This folder should be within the folder you shared with the instructor of this course.
Objective 1: Found Objects:
Find enough objects to create a grouping. The dynamics and size of the objects will define your finished form. Choose or create an extreme variety of forms, shapes, and sizes. Minimum of five objects.
Scale: Your finished sculpture scale will be in the ballpark of 864 square inches minimum. Example: 12 x 12 x 6 in.
Objective 2: Grouping:
Your goal is to create a dynamic singular form by grouping the objects. Use screws, string, twine, wire, clothes hangers, or other sturdy linear material to “group” and hold your objects together. Use chaos as your tool; make things project or push out from the form. Bend, tangle, wrap, and tie, the forms together. Introduce more found objects if needed or desired to develop your aesthetic. Make sure that parts of the objects expose themselves outside the chaos. Note: These objects will stay within the form. Don’t allow it to be too precious. Don’t marry yourself to the “work”. Have Fun!!!
Objective 3: Bind:
Use string, twine, nylon, or wire to bind the form further. The goal here is to create an area of tension by pinching and hiding components of the form together. Generally, this will strengthen the integrity of the form.
Objective 4: Documentation: Read further
Photographing your work: As an artist, a good portfolio will always set you apart from the rest of the crowd. When it comes to artist portfolios, pictures of your artwork are usually the first time a person may be introduced to your work. The images you provide are usually what make the biggest first impression. Therefore, it makes sense to practice photographing your art at the beginning and throughout your art career.
Photographing 3 Dimensional works:
Create a neutral setting for your photography
Eliminate unnecessary objects or clutter around your form.
There should be no visual relationship to other objects.
One should not be able to determine the size of your finished form except the relationships of forms found within the whole form itself.
Good Lightning.
The best representation of your object is the goal. For good lighting, one trick is to use multiple light sources on either side of your form. Minimize unnecessary shadows and highlights. Do not use filters that change the colors, saturation, and contrasts of your subject. The idea is to capture a true likeness of your art.
Setting up your camera and composition:
A good strategy is to position your camera in one place to photograph directly at the object and background of your composition. Adjust your lighting. Balance your composition. Crop in to eliminate the negative space around your form. Take your photograph. Your camera should stay in this position or as close to this position as possible. A good idea is to have a tripod to hold the camera. When you want to photograph another side of the piece simply turn the piece in the environment. Do not move the camera. This allows you to have a constant similar background and lighting for your three-dimensional work.
Take many shots of several sides of the piece. View them all on a computer screen before editing down to your best image.
Objective 5: Documentation: Format: Jpegs (3 Images)
Mission: Photograph your final work using a gray screen or an appropriate neutral backdrop for your work. A minimum of three views of the form should be photographed. I recommend more.
Place the photos in the folder created for this course in the corresponding project folder:
Use the naming convention below.
• Naming Convention: Examples
Project 1_Image 1_Your last name
Project 1_Image 2_Your last name
Project 1_Image 3_Your last name
Part 6: Image List: Google Doc.: Three Images and Information
Within the folder for this project, create a Google Doc.
Name the document like so “Marquez_Project 1_Image list” and place it in your image folder.
Example: Marquez_Project 1_Image list
Place the three images of your work in this doc.
Click the images and select the wrap text icon.
Size the image to about 1.5 to 2 inches wide.
Type this information beside each of the images:
Your name
Image Filename: example: “Project 1_Image 1_Your last name” etc.
HWD
Materials used
Year Complete
Course