
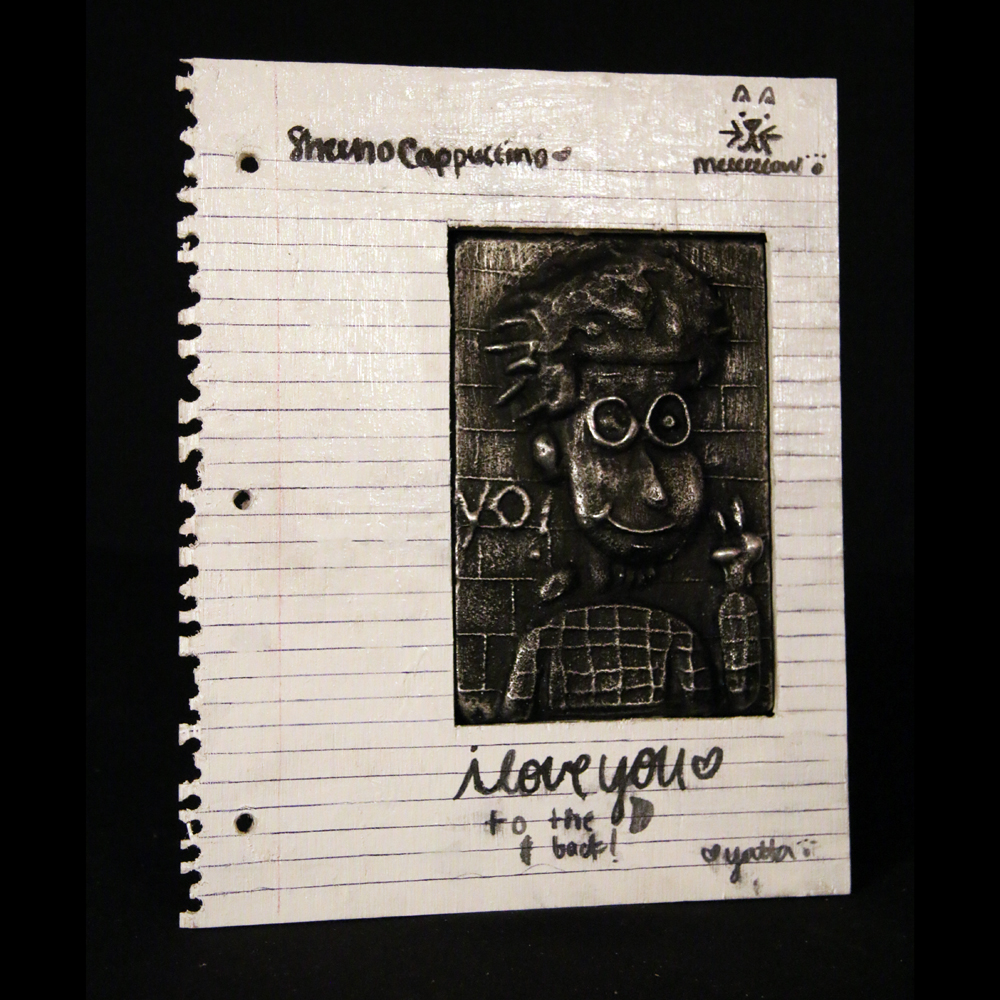
 In this project the student will learn the process of developing a “Relief” metal casting using a Scratch Block, a sand block bonded with resin, to create a the negative or inverse of a final relief sculpture. Metal will be poured in the scratch block to create the finished form. The metal relief sculpture will be finished, chased using metal working tools. Then a dioxide and wax will be applied to the surface. And finally a strategy must be developed to display the relief form.
- Carve a relief form/composition into the scratch block. Your composition is open to your imagination. Develop a composition of your own design or from observation. Stay away from trite or cliche logos. Sketch your composition in your sketchbook in advance so that the image will fit the format.
- The forms should be developed off the back panel so that the objects are sculptural, three dimensional. This sculptural quality should utilize undercuts to create shadows as well as subtle transitions from dark to light foreground and background. Basically the forms should protrude off the panel or frame creating contrasting values, strong and subtle highlights and shadow.
- The relief form/composition in the scratch block is now considered a “Mold”. Metal will be used to fill the mold to create a “Casting”.
- Group Engagement: The form will be cast in metal using the foundry. A pour crew will be developed from the class to execute the metal pour.
- Chasing the form: Finish the form in its metal state in preparation for surface treatment. You will be using metal finishing tools: electric and pneumatic grinders, files, sand paper, steel wool, and other polishing tools.
- Apply a patina to the form by adding a Dye-oxide to color the form. Steel wool can be used to polish highlights on the form. Wax may be used to seal the form from further oxidation.
- Develop a mounting strategy to present the piece on the wall or other form of presentation for critique. Try to develop a system that is un-obtrusive or does not overwhelm your composition. Keep It Simple, Less is more.
Note: This process uses chemicals and materials that might be dangerous for some people. Read the MSDS (Material Safety Data Sheet) for questionable materials. Please use rubber gloves and a dust mask while using chemicals and chemically treated sand.
This project will incorporate the use of the foundry and “Extremely Hot Metal”. Safety and a disciplined studio etiquette should be followed during metal pours. Wear proper clothing if you intend to assist in the pour. No poly or poly blend clothing. 100 % Cotton clothing, leather covered shoes, safety glasses, Leathers and safety shields are required for this process.
Materials needed for this project:
- Sand resin scratch block
- Tools for scratching into sand mold, Metal tools work well.
Steel wool - Foundry gear
- Metal: Aluminum will be used for this project.
- Two part adhesive (Epoxy)
- Materials for mounting or presentation strategy.
Cost:
If you wish to keep your sculpture, You are required to pay for the metal. Your aluminum piece will cost $4.00, if you wish to keep it.
Note: It is important to remember that to get a right reading image you should create any text and your image in a mirror image format on/in your mold. Be conscious in developing your relief sculpture, forms that you wish to fall back in the finished image area should project forward in your mold. Areas that you desire to protrude forward should fall back in your mold. It might fair you well to build a simple model (clay) of the desired forms to assist in developing these concepts and to have something to work from.