Cardboard Portrait

15MarquezStudent_2013smIn this project reclaimed cardboard is used to construct self portraits. The cardboard image and structure emphasize the importance of reusing and recycling materials and should provide an inspiring example of creative thought and innovation through repurposing materials.

Mission: Self Portrait

Develop a self portrait using an image of yourself, a word that reflects who you are, and cardboard. Any photo that shows a true likeness of your face can be used. A sheet of cardboard will be your canvas. The goal is to use a subtractive and additive method to develop a portrait using the layers of corrugated cardboard. The finished portrait should be a minimum of 11 x 17  inches. You may go larger.

Project Description/Outline:

  1. Begin with a photograph: A digital file will allow you to enlarge the image to fit your canvas. It will also allow you to add and compose text digitally.
  2. Prepare cardboard canvas. Sized to be fit with the chosen image. It is critical to have all image corners at 90º if you intend for the frame to be a true rectangle or square. Note: I usually refer to 90º corners as “square”.
  3. The image should be altered to black and white. This should be done to a point where the image is made up of positive and negative fields (areas). The average rendering can be made up of very little to no gray areas. This can be done by drawing or tracing the image paying close attention to these areas. You may expand the pallet to include multiple layers in accord with varying degrees of grey. Note: the image above has Three layers to develop the image: black, white and an exposed corrugated layer. Explore the possibilities.
*An alternative to this “hand and eye” design strategy is to put the image in photoshop and alter it to black and white and then the “Threshold” settings can be altered to get the image to your preference.
  4. Choose a word and font that best represents your personality. Develop them into your composition. The word or words must be at least seven characters.
  5. You will need to enlarge the image dimensions to the appropriate size.
  6. After a paper composition has been produced the image will need to be transferred to cardboard. Lightly mark the areas that separate positive and negative sections of the image. If you plan to strengthen the image quality with your own aesthetic this would be a good time to do so.
  7. Once transferred to the cardboard the image is ready to be developed by cutting, tearing and sanding away either the negative or positive areas. It may be necessary to darken the negative areas or pencil marks so they can be seen better in production. Your final image should have no pencil marks.Tearing and cutting away dark areas usually works best. What other methods can you explore and develop?
  8. Finally: Create a a frame of cardboard around your cardboard Portrait. 2 inch thick minimum. This can be done by layering strips of cardboard to create a thicker board. It is a good idea to experiment and create these strips/boards well in advance so they are ready when you are ready to complete the project. Be creative, What can be done to make the frame more interesting? Note: Exposed corrugated layers should be used as the face of the frame structure. The method demonstrated in class functions more structurally and can create an unexpected aesthetic to the project as a whole.
  9. Craft is important: Cuts and joints well executed. Clean up glue and pencil marks.

NOTE: Please refrain from cutting on table surfaces. Use a matt of cardboard or other material if you use the table. The floor works well to give one space to work and cut without damaging the table surfaces.

Research:

  • Low Relief
  • Rubber Stamps
  • Negative and Positive imagery
  • Cardboard: Material Properties
  • Texture by Exposing layers
  • Stencils
  • Screen Printing

Tools and Materials:

  • Utility Knife
  • Exacto or Hobby Knife
  • Cardboard
  • Card board paper
  • Pencils
  • Graphite
  • Adhesive (wood glue)
  • Masking tape
  • Transfer paper (optional)

Objectives:

Materials Characteristics:

  • Cardboard: Flat surfaces
  • Card board: Lamination
  • Laminated Layers
  • Skin
  • Corrugation (plains and patterns)

Concepts:

  • Elements of Design
  • Principles of Design
  • Composition
  • Texture
  • Pattern
  • Unity
  • Balance
  • Relief
  • Sensibility to form:
  • Representational Forms
  • Abstract Forms
  • Non-Objective Forms

Methods:

  • Technique
  • Cutting Safely
  • Thinking from 2-d to 3-d, layers
  • Organizing the surfaces of a corrugated cardboard plane to alternate between textures.
  • Developing Craftsmanship

Note: Use only Cardboard and Glue. No crayons, paints, chalks or inks. Factory pre-printed or pre-colored papers are fair game.

Create a label for your project with these specifics:

  • Name:
  • Dimensions: HWD
  • Materials:
  • Year Complete:
  • Course:
  • Tape your label in upper right corner of the back of your project.

Research/Inspiration: 

Project Gallery

Hot Metal Casting: Lost Wax Process

Perry_Beauty is in the Eye of the Beholder_2008Mission: (Project Description)

Hollow lost wax casting method: A unique wax pattern will be developed using plaster and rubber molds. The wax pattern will be taken through the “Lost Wax Process” to create a unique bronze or aluminum sculpture with a patina or alternative finishing method. Individual students have a choice to cast a wax form presented from a previous course or to create a new hollow casting for this project. A hollow lost wax casting method is the only technical criteria. If a new casting is to be produced, you are encouraged to create a composition and concept that pushes the envelope of this level course.

This project will challenge and further introduce the student to the processes of casting metal. A traditional investment material of plaster, silica sand and silica flour will be used for this project. The student should show an understanding of the methods listed below. A metal form will be cast and finished by the student.

Assignment:

For this assignment you are asked to build a 3- dimensional sculpture using at least three different wax elements. Wax welding will be used to bring these forms together in a well developed composition. You are encouraged to develop a sculpture that projects this level course. Create a form that suggest a concept that will engage your audience. Keep in mind that you should make some formal and technical decisions about visual balance, weight, interior and exterior form, proportion and other elements of design.

• Create a wax pattern. Plaster and rubber molds may be utilized.
• Include a hollow form in the composition.
• Assemble wax composition pattern from multiple wax objects.
• While building, consider casting methods and techniques, air traps, venting strategies.
• Create wax gating and runners from plaster molds.
• Create string vents.
• Gate, vent and prepare wax pattern to be cast.
• Prepare investment flask and chicken wire support.
• Invest wax pattern in Plaster/Silica Sand/Silica flour Investment mold.
• Wax will be burned out in kiln, This s a three day process. Plan for this in advance.
• Cast object in metal: This will be a team coordinated effort.
• De-invest pattern from investment mold.
• Remove gating from the casting.
• Metal Finish: Fasten or weld if necessary, chasing, grinding and filing.
• Metal Finish: “Patina”, chemical treatment of metal surface.
• Seal the form in wax or other finish.

Reliquary Component: (Optional)

Build a reliquary for your final chosen object. This reliquary can take on many forms but should house your form with absolute intent. The marriage between object and reliquary should make sense and have a good balance to focus the audience towards your work. Again craft is very important. Below is a list of types of reliquary objects and materials acceptable for the project.

• Wood: Sculpted, hollowed out, or fabricated wood structures
• A well designed/crafted crate may be fabricated as well.
• Plaster, plastic or wax castings of the body or other objects.
• Note: Plaster can be sculpted cast and  hollowed out to hold an artifact.
• Installations: Consider the idea that a reliquary is much like a shrine
• Metals fabrication/containers
• Glass
• Plastics
• Books: Sculpted, hollowed out, or fabricated structures
• Paper, books, and cardboard:

It is expected that the concept and fabrication of the reliquary and the marriage to the object, be convincing. Challenge yourself to meet the aesthetic and craft related to your object or concept and to the echelon of this course.

Craft:

Set yourself up for success. Craftsmanship should be strongly considered in developing a “good” pattern. Strive for craftsmanship even in the gating system. These considerations will make de-gating and finishing a much easier task once the form is in metal. Take care and don’t rush the process and the process will work for you rather than against you.

Hot Wax:

Wax is very hot, be careful in handling molds during casting and when welding wax. Red casting wax temperature should be between 250 and 300 degrees F.  Do not let wax smelter get too shallow. If there is no wax to fill it, turn it off. Wax should be left on continuously during our use. If you are the last one in the studio and leaving for the day, turn it down to 250 degrees F.

Alternative Materials:

Other material may be explored with instructor approval.

  • Natural Materials (Use your imagination)
  • Cotton cloth
  • Wood
  • 3d printed PLA and ABS

Larger Forms and Post Fabrication:

Scale: The sculpture scale is limited to the designated size in which the foundry can accommodate for this class. Plan ahead, measure the size of the burn-out kiln before you create a mold that will be too large for the kiln interior volume. Forms can be post fabricated. Think ahead. Think Modular. Design larger forms with smaller components that can be cast and fastened together to create the final larger form. Post fabrication techniques includes tap and die, screwing, bolting, keyed, welding, etc.

Kiln: You should keep a three inch perimeter around your mold away from the kiln interior wall to allow an even distribution of heat around the mold. Allow 6 inches of space for height. Shelving or kiln brick should be used to support your mold off the kiln floor. Kiln should be vented to allow moisture and carbon to escape.

Clean-Up Reminders:

Wax Work:

Cover the table surface when using wax: Use thick plastic, metal or cardboard to cover the tables and work areas. If these are unavailable cover your work area with newspaper.

Plaster Work:

Use newspaper to protect the table surfaces.

Investment:

A traditional investment material of plaster, sand and silica flour will be used for this project. To assist in clean up a layer of cardboard may be placed under your investment flask. Clean up accordingly, removing waste to dumpster behind sculpture.

Metal pour:

As a team you all will be in charge of coordinating and implementing metal pours. Primarily, your instructor will be available to assist in some process and technical questions and to observe. All pours should be scheduled during class times.

De-Investing:

When de-investing, remove the waste material to the dumpster. This material gets too heavy for one person to clean up. A metal garbage can, hand truck or cart may be used to transport the material to the dumpster. Just remember, If you make a mess, clean it up!

Wear appropriate clothing during foundry pours.

• Cotton clothing, pants and shirt.
• Leathers or Fire resistant suits
• Safety Glasses
• Safety shield
• Hard Hat-welding cap
• Leather covered shoes (Steel toed preferred)
• Leather chaps or leggings
• Leather spats
• No Poly blends, No Pleather: These can be extremely flammable near the pouring activities.

Tools and Materials:

• Eye Protection/Safety Glasses
• Dust Mask/Particulate Respirator
• Sketch Book
• Clay Tools
• Hot knife or soldering tool
• Hobby knife
• Fettling knife
• Trimming Tools (Various sizes)
• Loop, wire and ribbon tools
• Wooden modeling tools
• Needle Tool
• Wax smelting pot
• Wax
• Wax tools
• Materials for cast pattern
• Mixe media
• Adhesives, fastening materials
• Wood
• Wood Shop
• Metal
• Rubber or Latex gloves• Metal: Aluminum, Bronze, Iron
• Casting Foundry/Furnace
• Welding Eye Protection
• Welding Gloves
• Angel Grinder
• Grinding disc
• Cut off disc
• Flap Disc

Type of facilities and furnace will designate what casting metals will be used.

Create a label for your project with these specifics:

• Name:
• Dimensions: HWD
• Materials:
• Metal casting weight:
• Year Complete:
• Course:

Tape your label to your project. Use masking tape so that it will not harm your project.

Objectives:

  • Method: Planning, Cutting Safely, Building techniques and strategies
  • Material Characteristics:
  • Three-Dimensional Pattern and mold Making
  • Volume: HWD
  • Fabrication techniques: Wax and metal casting fabrication, Object creation
  • Mold Gating/Sprue Methods
  • Hot Metal Casting Process
  • Successful Casting
  • Metal Fabrication techniques: Post Casting fabrication, Object Installation
  • Structural and Aesthetic qualities
  • Finishing Techniques: Heat and chemical surface treatments
  • Sensibility to form: Good design, clean aesthetics
  • Integrity of the artist to their craft
  • Conceptual development

Evaluation:

  • Work Ethic: Participation in and out of class
  • Scheduling: Students stay on task, project finished by deadline, critique.
  • Well Engineered and Functional mold
  • Craftsmanship and aesthetics: Well crafted mold with well crafted “Clean”castings.
  • Post Fabrication and Insatlation
  • Conceptual development

Caution:

Chemicals and fumes: This process uses chemicals and materials that might be dangerous for some people. Read the MSDS (Material Safety Data Sheet) for questionable materials. Use a respirator and rubber or latex gloves while using chemicals. A dust mask may be used rather than a respirator. The respirator will provide much better protection. Be aware, if you notice an allergic reaction such as skin irritation as a result of use of  any materials used, please inform the instructor.

Hot Wax: This project will incorporate hot wax and wax welding tools. Be careful for yourself and when working around others. Safety and a disciplined studio etiquette should be followed during all studio activities. Hot tools will burn, be careful to not place them on any surface that will burn or melt. Be aware of people working around you. Turn off or unplug tools when leaving unattended.

Foundry: This project will incorporate the use of the foundry and “Extremely Hot Metal”. Safety and a disciplined studio etiquette should be followed during metal pours and all studio activities.

Note: Ceramic Shell and other casting methods may be used as an alternative to this project, with instructor approval.


You tube Video:

Wax Gating for Lost Wax Process: Hollow Patterns 

Research/Inspiration:

U-Ram Cho
Kris Kuksi
Christian Marclay
Tim Hawkinson
Andrew Werby
Louise Bourgeois  PBS
Jessica Joslin
Kathie Olivas and Brandt Peters
Elizabeth King
Ron English
Steve Dilworth
Sophie Kahn
Becky McDonah
Christopher Conte
Ashley Wood

Project Gallery

Exquisite Corpse: Artifacts

hildesheim_corpse2010_72Exquisite corpse or Cadavre exquis is traditionall a drawing technique where a bank of words or images are collected and then assembled to create a finished composition.  In this project we will explore this surrealist idea in an assemblage of components to create as “Exquisite corpse” sculptural artifact.

Mission: (Project Description)

 In this project the student is asked to create five artifacts from the inventory of objects created from previous mold making assignments. Students are allowed to to melt, cut, deconstruct and transform existing objects and reassemble them into unique sculptural forms/figures. The final form may be prepared as if to be cast in metal using teethe gating method for traditional investment lost wax method. Other materials may be added. Attentions should be given on how additional materials are fastened to the wax objects. Note wether objects will remain as  original material or be cast pin metal.

Sketchbook Assignment:

Sketches of your ideas should be rendered before and during sculpting. A minimum of five pages should be dedicated to this sketching component. Draw as you create. Draw what you create. Take notes. Printed images of inspirational sculptures or objects should be placed in your sketch book as well. Your sketch book will be graded along with your project.

Scale:

A 9 to 10 inch object should be the goal of the wax component of this assignment. Five compositions that explore this process is expected. Students are encouraged to develop more than five composition. Focus on strategies and structures that will hold together. A functional wax welding technique is critical for patterns to hold together. Slush larger forms, wax forms larger than a 2 inch thickness should be cast hollow.

Engineering:

Focus your attention on how things go together. Craft is important to allow this form to be ready for the lost wax casting method. Tactics on connecting parts to one another should be a major factor while choosing and making the object as a whole. Structure and how the form stays together compositionally will be held under strong critique.

Material/Structure:

Wax and other components. Wax welding will be explored for this project. Other materials to hold form together will also be a necessity: wire, mechanical fasteners, adhesives, and innovation…  Students are encouraged to add other materials/ components to the form. Yet 60 percent of the form should be constructed of components made from molds produced in this course.

Reliquary Component:

Build a reliquary for your final chosen object. This reliquary can take on many forms but should house your form with absolute intent. The marriage between object and reliquary should make sense and have a good balance to focus the audience towards your work. Again craft is very important. Below is a list of types of reliquary objects and materials acceptable for the project.

• Wood: Sculpted, hollowed out, or fabricated wood structures
• A well designed/crafted crate may be fabricated as well.
• Plaster, plastic or wax castings of the body or other objects.
• Note: Plaster can be sculpted cast and  hollowed out to hold an artifact.
• Installations: Consider the idea that a reliquary is much like a shrine
• Metals fabrication/containers
• Glass
• Plastics
• Books: Sculpted, hollowed out, or fabricated structures
• Paper, books, and cardboard:

It is expected that the concept and fabrication of the reliquary and the marriage to the object, be convincing. Challenge yourself to meet the aesthetic and craft related to your object or concept and to the echelon of this course.

Tools and Materials:

• Eye Protection/Safety Glasses
• Sketch Book
• Clay Tools
• Hot knife or soldering tool
• Hobby knife
• Fettling knife
• Trimming Tools (Various sizes)
• Loop, wire and ribbon tools
• Wooden modeling tools
• Needle Tool
• Dust Mask/Particulate Respirator
• Safety Glasses
• Wax smelting pot
• Wax
• Wax tools
• Materials for cast pattern
• Mixe media
• Adhesives, fastening materials
• Wood
• Wood Shop
• Metal
• Rubber or Latex gloves

Create a label for your project with these specifics:

• Name:
• Dimensions: HWD
• Materials:
• Year Complete:
• Course:

Tape your label to your project. Use masking tape so that it will not harm your project.

Objectives:

  • Method: Planning, Cutting Safely, Building techniques and strategies
  • Material Characteristics:
  • Three-Dimensional Pattern Making
  • Volume: HWD
  • Fabrication techniques: Wax casting fabrication, Object creation
  • Structural and Aesthetic qualities
  • Finishing Techniques: Heat and chemical surface treatments
  • Sensibility to form: Good design, clean aesthetics
  • Integrity of the artist to their craft

Evaluation:

  • Work ethic: Participation in and out of class
  • Scheduling: Students stay on task, project finished by deadline, critique.
  • Well Engineered and Functional mold for long term use.
  • Craftsmanship and aesthetics: Well crafted mold with well crafted “Clean”castings.

Caution:

This process uses chemicals and materials that might be dangerous for some people. Read the MSDS (Material Safety Data Sheet) for questionable materials. Please use a respirator and rubber or latex gloves while using chemicals. A dust mask may be used rather than a respirator. The respirator will provide better protection.

This project will incorporate hot wax and wax welding tools. Be careful for for yourself and when working around others. Safety and a disciplined studio etiquette should be followed during all studio activities.

Research/Inspiration:

U-Ram Cho
Kris Kuksi
Christian Marclay
Tim Hawkinson
Andrew Werby
Louise Bourgeois  PBS
Jessica Joslin
Kathie Olivas and Brandt Peters
Elizabeth King
Ron English
Steve Dilworth
Sophie Kahn
Becky McDonah
Christopher Conte
Ashley Wood


Project Gallery

Hot Metal Casting: Sand Molds

06_Wheatley_Toxic Swimmer_2014

Mission: (Project Description)

In this project the student will learn the process of developing a metal casting using a two-part sand resin bond mold. The first part of the project will be to create a pattern using a variety of methods and materials. Mixing sand and resins the student will create a mold. The mold will be used to create a void to be poured in metal. The metal sculpture will then be finished accordingly. The student will be graded by keeping schedule with the processes of the assignment as well as the finished form. Keep up, so you do not fall behind.

Sketchbook Assignment:

Sketches of your ideas should be rendered before and during sculpting. A minimum of five pages should be dedicated to this sketching component. In addition, find a minimum of four cast sculptures or objects that inspire you. Printed images of these sculptures or objects should be placed in your sketch book. Your sketch book will be graded along with your project.

Project Tasks:

Metal casting: Create a metal casting using an original student created pattern and a multi-part sand-resin bond mold.

  1.  Form: Create a pattern, Open to individual concepts.
  2. Surface: Form should have at least two textures that create balance in the form and surface, yet contrast significantly.
  3. Movement: Form and surface should draw the viewer around the form  
  4. Multi-Part mold: Using the pattern, sand-resin bond will be used to create the components of the sand mold.  Gating: A gating system will be carved into the mold parts to allow metal to be poured into the cavity left by the pattern.
  5. Yoke: Create a yoke system for the mold.
  6. Casting: Pour the sculpture in metal.
  7. De-gating and Metal finishing: Prepare the form for patina.
  8. Patina/Surface Treatment: Patina or dye-oxide
  9. Sealant: Seal the finished form.

Pattern Note:

Create a pattern using a material that will pull out of your mold: clay, wood, paper, styrofoam and many other materials may be used. Your pattern should be well crafted. Create a draft in your pattern so it pulls from the mold more easily.

Pattern dimensions should be approximately 4.5 x 8 x 2  inches. This is the smallest dimension. Due to material availability consult the instructor before executing larger forms. Realize… the larger the form, the larger the mold, equals more work and material cost.

Wood Shop Note:

Before cutting any materials in the wood shop, Make sure all staples and metals are removed from the material. Make an extra effort to affirm that no screws or nails remain in purchased or reclaimed materials.

Group Participation:

• Mold Making: Group Engagements: There will be several Sand Parties to create the “Sand-Resin Bond” molds. This will be a class endeavor, where sand and chemicals will be mixed and rammed at the same time to reduce waste. Absence or lack of participation during these events will have an effect your grade. Excess sand from this process should be promptly rammed into Scratch block molds.

• Metal Casting: Group Engagement:  The form will be cast in metal using the foundry. Casting crews and task will be designated. Attendance and participation offer much to the experience. Absence or lack of participation during these events will have an effect your grade.
Wear appropriate clothing during foundry pours. 

• Cotton clothing, pants and shirt.
• Leathers or Fire resistant suits
• Safety Glasses
• Safety shield
• Hard Hat-welding cap
• Leather covered shoes (Steel toed preferred)
• Leather chaps or leggings
• Leather spats
• No Poly blends, No Pleather: These can be extremely flammable near the pouring activities.

Tools and Materials:

• Sketch Book
• Dust Mask/Particulate Respirator
• Safety Glasses
• Protective clothing: Leathers
• Materials for pattern
• Mold materials
• Sand
• Sand resin chemicals
• Wood
• Wood Shop
• Metal: Aluminum, Bronze, Iron
• Casting Foundry/Furnace
• Rubber or Latex gloves
• Welding Eye Protection
• Welding Gloves
• Angel Grinder
• Grinding disc
• Cut off disc
• Flap Disc

Type of facilities and furnace will designate what casting metals will be used.

Create a label for your project with these specifics:

• Name:
• Dimensions: HWD
• Materials:
• Metal casting weight:
• Year Complete:
• Course:

Tape your label to your project. Use masking tape so that it will not harm your project.

Objectives:

  • Method: Planning, Cutting Safely, Building techniques and strategies
  • Material Characteristics:
  • Three-Dimensional Pattern Making
  • Mold Making Process: Cope and Drag
  • Volume: HWD
  • Mold Gating/Sprue Methods
  • Hot Metal Casting Process
  • Successful Casting
  • Fabrication techniques: Post Casting fabrication, Object Installation
  • Structural and Aesthetic qualities
  • Finishing Techniques: Heat Treated Patina
  • Sensibility to form: Good design, clean aesthetics
  • Integrity of the artist to their craft

Caution:

Chemicals and fumes: This process uses chemicals and materials that might be dangerous for some people. Read the MSDS (Material Safety Data Sheet) for questionable materials. Please use a respirator and rubber or latex gloves while using chemicals and chemically treated sand. A dust mask may be used rather than a respirator. The respirator will provide better protection.

Foundry: This project will incorporate the use of the foundry and “Extremely Hot Metal”. Safety and a disciplined studio etiquette should be followed during metal pours and all studio activities.


Research and Inspiration:

Project Gallery

Sculpting the Human Head/Body

Fickle_72Prologue:

The bust has been used for centuries to honor, memorialize, characterize and distinguish identities of culture. As a social political tool, as many forms of art have been and will be, the face and bust have been used to provide as an instrument of social control and propaganda. For ourselves and prosperity art through human form has been a link to the identities of personalities of the past. History, mythology, and other stories are hinted and revealed by these simple yet complex forms. We have a compulsive draw towards the replication of identity through various mediums, to empower a material to conjure a sense of preservation.

Mission: (Project Description)

In this project the student will be asked to create a replication of the human head/bust or figure, to recreate a realistic form in clay from observation. The form must appear relatively realistic. (Makes sense, right?). A additive/subtractive method will be used. References are suggested below. Students must attend class for faculty instruction, support, observation, and in process critique.

The final form will be developed further. The student may choose the next component of the assignment. The next steps way heavily on the materials used in the initial fabrication of the form. Plan ahead for the final materials and results expected from this assignment. Each option below must be discussed with the instructor. Option 1 is equal to one project. Option 2 is equal to one project. Option three is equivalent to three projects. These equivalents are relative. The development of the student proposal may expand the time needed for these base options.

Option 1: Ceramic Model/ Fired Ceramic/ Finished Ceramic Form

  • Student should research, modeling the human figure.

  • An armature will be built for the form.
  • The form is modeled in a ceramic material conducive to low shrinkage.
  • Form will be graded in clay (wet, green, or bone dry)
  • Student should research, prepare the piece for firing
  • The form will be split and hollowed to reduce damage.
  • The form will be scored and slipped back together.
  • The surfaces will be refinished in accord to aesthetic
  • Student and faculty will organize firing.
  • Final form will be graded in clay (wet, green, or bone dry)
  • The form will be be fired in accord with the ceramic clay body used.
  • A finish will be applied.

Option 2: Clay Model/ Mold/ Cast Plaster or Alternative Material/ Finished Form

  • Student should research, modeling the human figure.
  • An armature will be built for the form.
  • The form will be modeled in a clay material conducive to a plaster mold.
  • The form will be graded in clay (wet/green)
  • A multi-part plaster mold will be made from the clay original.
  • A form will be cast from the mold
  • The surfaces will be refinished in accord to aesthetic.
  • A finish will be applied.

Option 3: Clay Model/ Rubber Mold / Multiple Material Castings/ Finished Forms

  • Student should research, modeling the human figure.
  • An armature will be built for the form.
  • The form is modeled in a clay material conducive to a rubber mold.
  • Final form will be graded in clay (wet/green)
  • A multi-part rubber/ plaster mold will be made from the clay original.
  • The mold will be graded on aesthetic and functionality.
  • Forms will
    be cast from the mold.
  • A plaster will be cast from the mold.
  • The plaster will be finished within/as a composition
  • A wax form will be cast from the mold to create a metal casting.
  • The form will be gated, invested and cast in metal.
  • Foundry Process: Lost wax process.
  • Student and faculty will organize burnout.
  • The mold will be filled with  metal.
  • The form will be de-invested and de-gated.
  • The surfaces will be refinished in accord to aesthetic.
  • A finish will be applied.
  • Type of facilities and furnace will designate what casting metals will be used.

A great amount of effort should be placed on crafting the materials that they visually simulate the aesthetic and objective of this assignment. Materials, shapes and forms should transition from one to the other in a convincing manner.

Overview: Challenge yourself and the project. 

Project grades gain much from the thought and “Effort” put into them.This project is traditionally based. Sensitivity to the model and technique, observation, and measuring are key to creating a likeness that satisfies this challenge. A word of advice, a three dimensional model will greatly inform how one models this form. It will make it easier to see the true form. Two dimensional models, i.e. photos, are less likely to give the amount of detail found on a real model.

To do list and Techniques:

  • Play: Experiment Session:
    • Sketching.
    • Quick gesture modeling:
    • Learn to work the clay.
    • Clay modeling, rolling in hand and fingers, molding, attaching, trimming, cutting, scraping, Use available tools, hand made tools. A variety of tools should be experimented with.
  • Choose: Choose a model.
  • Research:
    • Observation of model
    • Techniques
    • Measuring
    • Sketches
    • Practice on individual components
    • Small models in clay.
  • Collect:
    • Print and collect imagery and text of your research.
    • Human Anatomy
    • Strategies
    • Styles.
  • Making Sense: Make it believable.
  • Prefinish: Form is critiqued in green state and at leather hard stage.

Goals:

  • Well crafted form
  • Developed technique
  • Uniform aesthetic
  • A command over the material:
  • Excellent Craftsmanship should be a major goal for all processes explored.

Tools and Materials:

  • Sketchbook  (Hard bound, 9 in. by 12 in. or larger recommended)
  • Clay
  • Clay sculpting tools
  • Clay tools
  • Scraping tools
  • Burnishing tool (Spoon)
  • Texturing, scoring tool (Fork)
  • Metal Ruler (cork backing preferred): 24 in. or 36 in.
  • Calipers
  • Seamstress tape
  • Armature material
  • Safety Goggles/Glasses/ Eye Protection
  • Drawing Pencils and Erasers
  • Measuring tape
  • Utility Knife w/extra blades and X-Acto knife w/blades
  • Adhesives and Masking tape
  • Adhesive Bandages
  • Variety of Pliers and Wire Cutters
  • Plasticine Clay (Soft)
  • Sharpies
  • Mold Max 30: One gallon kit to 5 gallon kit may be needed
  • Wood and MDF
  • 3-5 gallon plastic bucket and other mixing containers
  • Paint (optional)
  • 4 1/2 inch Angle Grinder w/grinding, cutting and flap disc
  • Leather covered work boots/shoes (Stay away form Synthetics or Poly blends)
  • Leather Welding Jacket (Stay away form Synthetics or Poly blends)
  • Leather work gloves/welding gloves
  • Welding Helmet (Shade 9+)
  • Shade 5 Welding Glasses( for oxy-acetylene)

Books and Resources:

Create a label for your project with these specifics:

• Name:
• Dimensions: HWD
• Materials:
• Metal casting weight:
• Year Complete:
• Course:

Tape your label to your project. Use masking tape so that it will not harm your project.

Objectives:

  • Sculpting the human figure
  • Presentation strategy
  • Method: Planning, work ethic, building techniques and strategies
  • Material Characteristics:
  • Three-Dimensional Pattern Making
  • Mold Making Process: Lost wax/Sand casting-Cope and Drag
  • Volume: HWD
  • Mold Gating/Sprue Methods
  • Hot Metal Casting Process
  • Successful Casting
  • Fabrication techniques: Post Casting fabrication, Object Installation
  • Structural and Aesthetic qualities
  • Finishing Techniques: Heat Treated Patina
  • Sensibility to form: Good design, clean aesthetics
  • Integrity of the artist to their craft

Caution:

Chemicals and fumes: This process uses chemicals and materials that might be dangerous for some people. Read the MSDS (Material Safety Data Sheet) for questionable materials. Please use a respirator and rubber or latex gloves while using chemicals and chemically treated materials. A dust mask may be used rather than a respirator. The respirator will provide better protection.

Foundry: This project will incorporate the use of the foundry and “Extremely Hot Metal”. Safety and a disciplined studio etiquette should be followed during metal pours and all studio activities.


Research and Inspiration:

Project Gallery

Wood Carving: Merging Early and Contemporary Icons

FelliniwebMission:

In this project create a wood carved mask that visually merges early and contemporary icons. The mask should take on a combination of both icons chosen. The main material will be wood, other materials can be used to embellish the form. Try to use materials that are a part of our current culture. Accumulated objects or components of devices we use might be good resource. A visit to the salvage yards will be a good resource as well.

Guidelines:

  1. Build and carve a mask which merges an icon form the past and an icon from the present.
  2. Process: The finished sculpture should be built through the use of wood lamination and carving.
  3. Wood purchased or found for this project should have No nails or Staples, If you find them in the wood remove them and have the instructor approve before cutting with saws or equipment. Non chemically treated wood only. Suggested material is two by fours, but obviously there are other sizes that may work to your advantage.
  4. Scale: A minimum of 1.5 ft in one dimension (HWD). A good starting point would be purchasing or having on hand two 8 ft two by fours.
  5. Finish: You may decorate your carved mask in accord with your selected icons.
  6. Students are strongly encouraged to combine or evolve the project using other materials and media to complete the finished form. Take chances.

Overview: 

This project should include a design that incorporates wood lamination and carving. No metal fasteners, such as nails and screws should be used in the lamination process of this project. Nails, screws and other metal fasteners can damage chisels, equipment blades and other carving tools. The design should be built in a manner that presents a relevant conclusion to the subject, two chosen icons. Your mission is to build a form that acts as a symbol in resolve of  your creativity towards the concept.

Engage, Invite, excite, challenge, your audience to react to your work.

Function, Engineering and concept: An understanding of the material, process, and concept should be a major concentration for this assignment.

Materials to purchase or acquire for this project.

2-3  two by fours: Pine or cedar is a soft wood that can be easily carved.
Ratcheting Straps (2)
Sand paper
Wood rasps, Chisels
Wood Glue
Finishing materials
Paints and Sealers

Safety:

Wear appropriate eye protection, clothing and shoes while working with wood equipment.
Wood shop tools can be very sharp.
Be aware of peers working near and where you are aiming your tools.
Do Not Use “Treated Wood” in the studio. Stay away from a treated lumber. Some lumbers have arsenic as a treatment.

 Writing Assignment:  

As a beginning level course, the student is responsible for developing and presenting a typed research paper of their work for this assignment. The final document should include a description of themes/concepts the artist is addressing, descriptions of how the artist uses imagery, materials and material qualities to address their themes, images of the artist’s works and other supportive documentation. The processes and techniques the artist utilizes to create their work may also contribute to the research.

Writing Assignment Guide Lines:
Below is a brief outline of format and what is expected in your writing assignment.

  1. Cover sheet:
    1. “Your Name”
    2. Research Title
    3. Sculpture 1
    4. “Semester and Year”
    5. “Instructor’s Name”
  2. Body: (500 words +)
    1. Introduction Paragraph
    2. Your research
    3. Images of your work
    4. Summary
    5. Bibliography: Cited text and images.
  3. Images
    1. Images can be printed within the body text
    2. Images can be printed on pages after the body text
    3. If you have trouble placing images in your Document, Please see me.

Sketch Book: Merging early and contemporary icons.

1.  Find and print- 10 images- early masks
2.  Find and print-10 images- contemporary masks
3.  Add images to sketchbook
4.  Generate 6 full pages of sketches, combining early and contemporary masks.

Processes

1.  Select sketches to model your concept in clay
2. Wood lamination with 2×4’s and other wood materials
3. Begin Carving: This may be an additive and subtractive process.
4. Design and fabricate a method to wear the mask. Welding and other methods may play a part here.
5. Paint and embellishments
6. Consider the antiquity of your form is this a new mask or does it have a sense of history.
7. Dance and Performance: Develop an interpretive performance: Solo or Group engagement

Research and Inspiration:

Anthropomorphic(having human characteristics)
Thai Masks
African Masks
Bundu helmet mask
Lewa spirit mask
Mumuye mask
Biombo helmet mask
Luba Style Mask with Brass Made in Ghana
Djibouly Mask Made in Mali
Aztec mask
Northwest Coast Masks: Native American mask
Venetian Masks
Japanese Masks
Jake and Dinos Chapman
Ron Mueck
501st Legion “TK Project” Stormtrooper Helmets
AJ Fosik

Videos:

Sharpening wood carving tools

Plaster Carving Non Objective Form: Abstraction Morphing/Transformation

Wheatly_MMission: (Project Description)

Using two forms build one, morphing the forms together to become a non-objective or abstract formal composition. The original forms are to be used as inspiration to assist in guiding the form. Use elements from each, yet develop your sculpture as a unique entity with an elegant form and a clean aesthetic. Original chosen objects may be mechanical (man-made) or natural.

  • Bring a wire cloth hanger and nylon stocking. This will be used to build a non objective form to base your carving to. The wire will be an armature for the nylon which will become a surface and skin.
  • Bring two interesting objects from home, which are approximately the size of your hand. Objects may be mechanical or organic.
  • Bring a container to build a blank. (1 gal. container.)
  • Create a blank from plaster.
  • Brain storm and Sketch ideas.
  • Plaster Carving: Create an abstract form from objects and sketches.

Sketchbook Assignments: (Five pages)

  • Assignment 1: Sketch original objects in your sketchbook. (3 views of each, 2 pgs)
  • Assignment 2: Preliminary and in process sketches of plaster form. (3 pages)

Additional Criteria: Strategies, Technique and Composition: (Project Description)

  • Clay may be used as a modeling/sketching tool: Sketches do not always start in the sketch book. Model, in clay an abstract form, drawing characteristics from your two objects. This will assist you in developing the composition. Images of these moquettes may be placed in your sketchbook and are valid sketches.
  • This project relies on the elements of light and shadow. Carve so that light and shadow create the dynamics of the form. No paint, pigments or inks should be used for this project.
  • Use repetition, directional curves and form to create a since of movement.
  • Develop a composition with movement that will draw the viewer around and into the form.
  • Use models, sketches and your own intuitive inspirations to create. Process will play a great part in your exploration as you learn the material, developing carving techniques and sensibilities.
  • Think about how these objects work together to create one form or how one may seem to dominate over the other, seeming to swallow or assimilate.
  • Craftsmanship: Elegant form and a clean aesthetic should be a goal.
  • Pay attention to building a form that has interior definition as well as exterior. Carving and modeling in the interior of the object will challenge your abilities, as always you are encouraged to push beyond the average.
  • Do not leave any indication of the container of your original form. Work the whole form.
  • Remember its okay to go back to sketches drawn or sculpted to alter and redesign your composition as you work through the project. This is a part of the process.

Tools and Materials:

  • Clay for sketching (Plasticine)
  • Plastic or wax Container- Bring your own. Plastic or wax coated.
  • Pottery Plaster No. 1
  • Sanding Screen (Drywall Sanding Screen or sand paper)
  • Sketchbook
  • Plaster Drywall wrasp
  • 8” Rasp- Purchase at art, wood or craft stores
  • Other Scraping Tools: Spoons forks, Files, Knives, Drill
  • Clay trimming tools, spoons, knives, forks, old saw blades (be inventive)
  • Dust Mask

Project Critique:

  • Project should be finished before the beginning of class critique session.
  • Projects will be discussed during the critique.

Think About:

  • The Elements of Design: line, texture, shape, light, form, space, time,
  • The Principles of Design: balance, proportion, rhythm, emphasis, and unity
  • Exterior vs. Interior, Primary and  Secondary Contours, Positive & Negative Forms, Static and Dynamic Forms

Photographing your work:

Photograph your work: A minimum of two types of images of your object should be made and emailed to the instructor of this course.

As an artist, a good portfolio will always set you apart from the rest of the crowd. When it comes to artist portfolios, pictures of your artwork are usually the first time a person may be introduced to your work. The images you provide are usually what make the biggest first impression. There for, it makes sense to practice photographing your art at the beginning and throughout your art career.

Image 1: 3-D portfolio image:

Neutral Setting Studio Shot: Should have no visual relationship to other objects. One should not be able to determine the size of your finished form. Good composition, good lighting and the best representation of your object is the goal. Minimize unnecessary shadows and highlights. A grey screen and lighting is available in room FAC 183. Take many shots of several sides of the piece. View them all on a computer screen before editing to the best.

Image 2: Creative Monumental Composition Using Forced Perspective:

Create the illusion that your sculpture is monumental by using forced perspective. Forced perspective techniques manipulates our human perception with the use of optical illusions to make objects appear larger, smaller, farther, or closer than they actually are. Movie makers sometimes use forced perspective to turn plastic toys and other objects into gigantic forms and characters we see on screen. The use of digital effects today still incorporates this popular way of portraying scenes or objects. A search on the web should gain several hits on strategies for creating a forced perspective image.

Before Critique:

Write a short paragraph about the form.

  • Descriptive, poetic, narrative…..What is or can the piece be about?

During Critique:

Reactions to work done by peers.

  • Use your own dialogue and the following:
  • Reactions to form: Positive reactions-Negative reactions
  • Sensibility to form:
  • Elements of Design:
  • Principles of Design:
  • Concepts: What ideas come to mind when you look at the object?
  • Relax: Keep an open mind.

Research/Inspiration:


Project Gallery

Cardboard: Mechanical Objects to Cardboard Objects

11MarquezStudent_2013
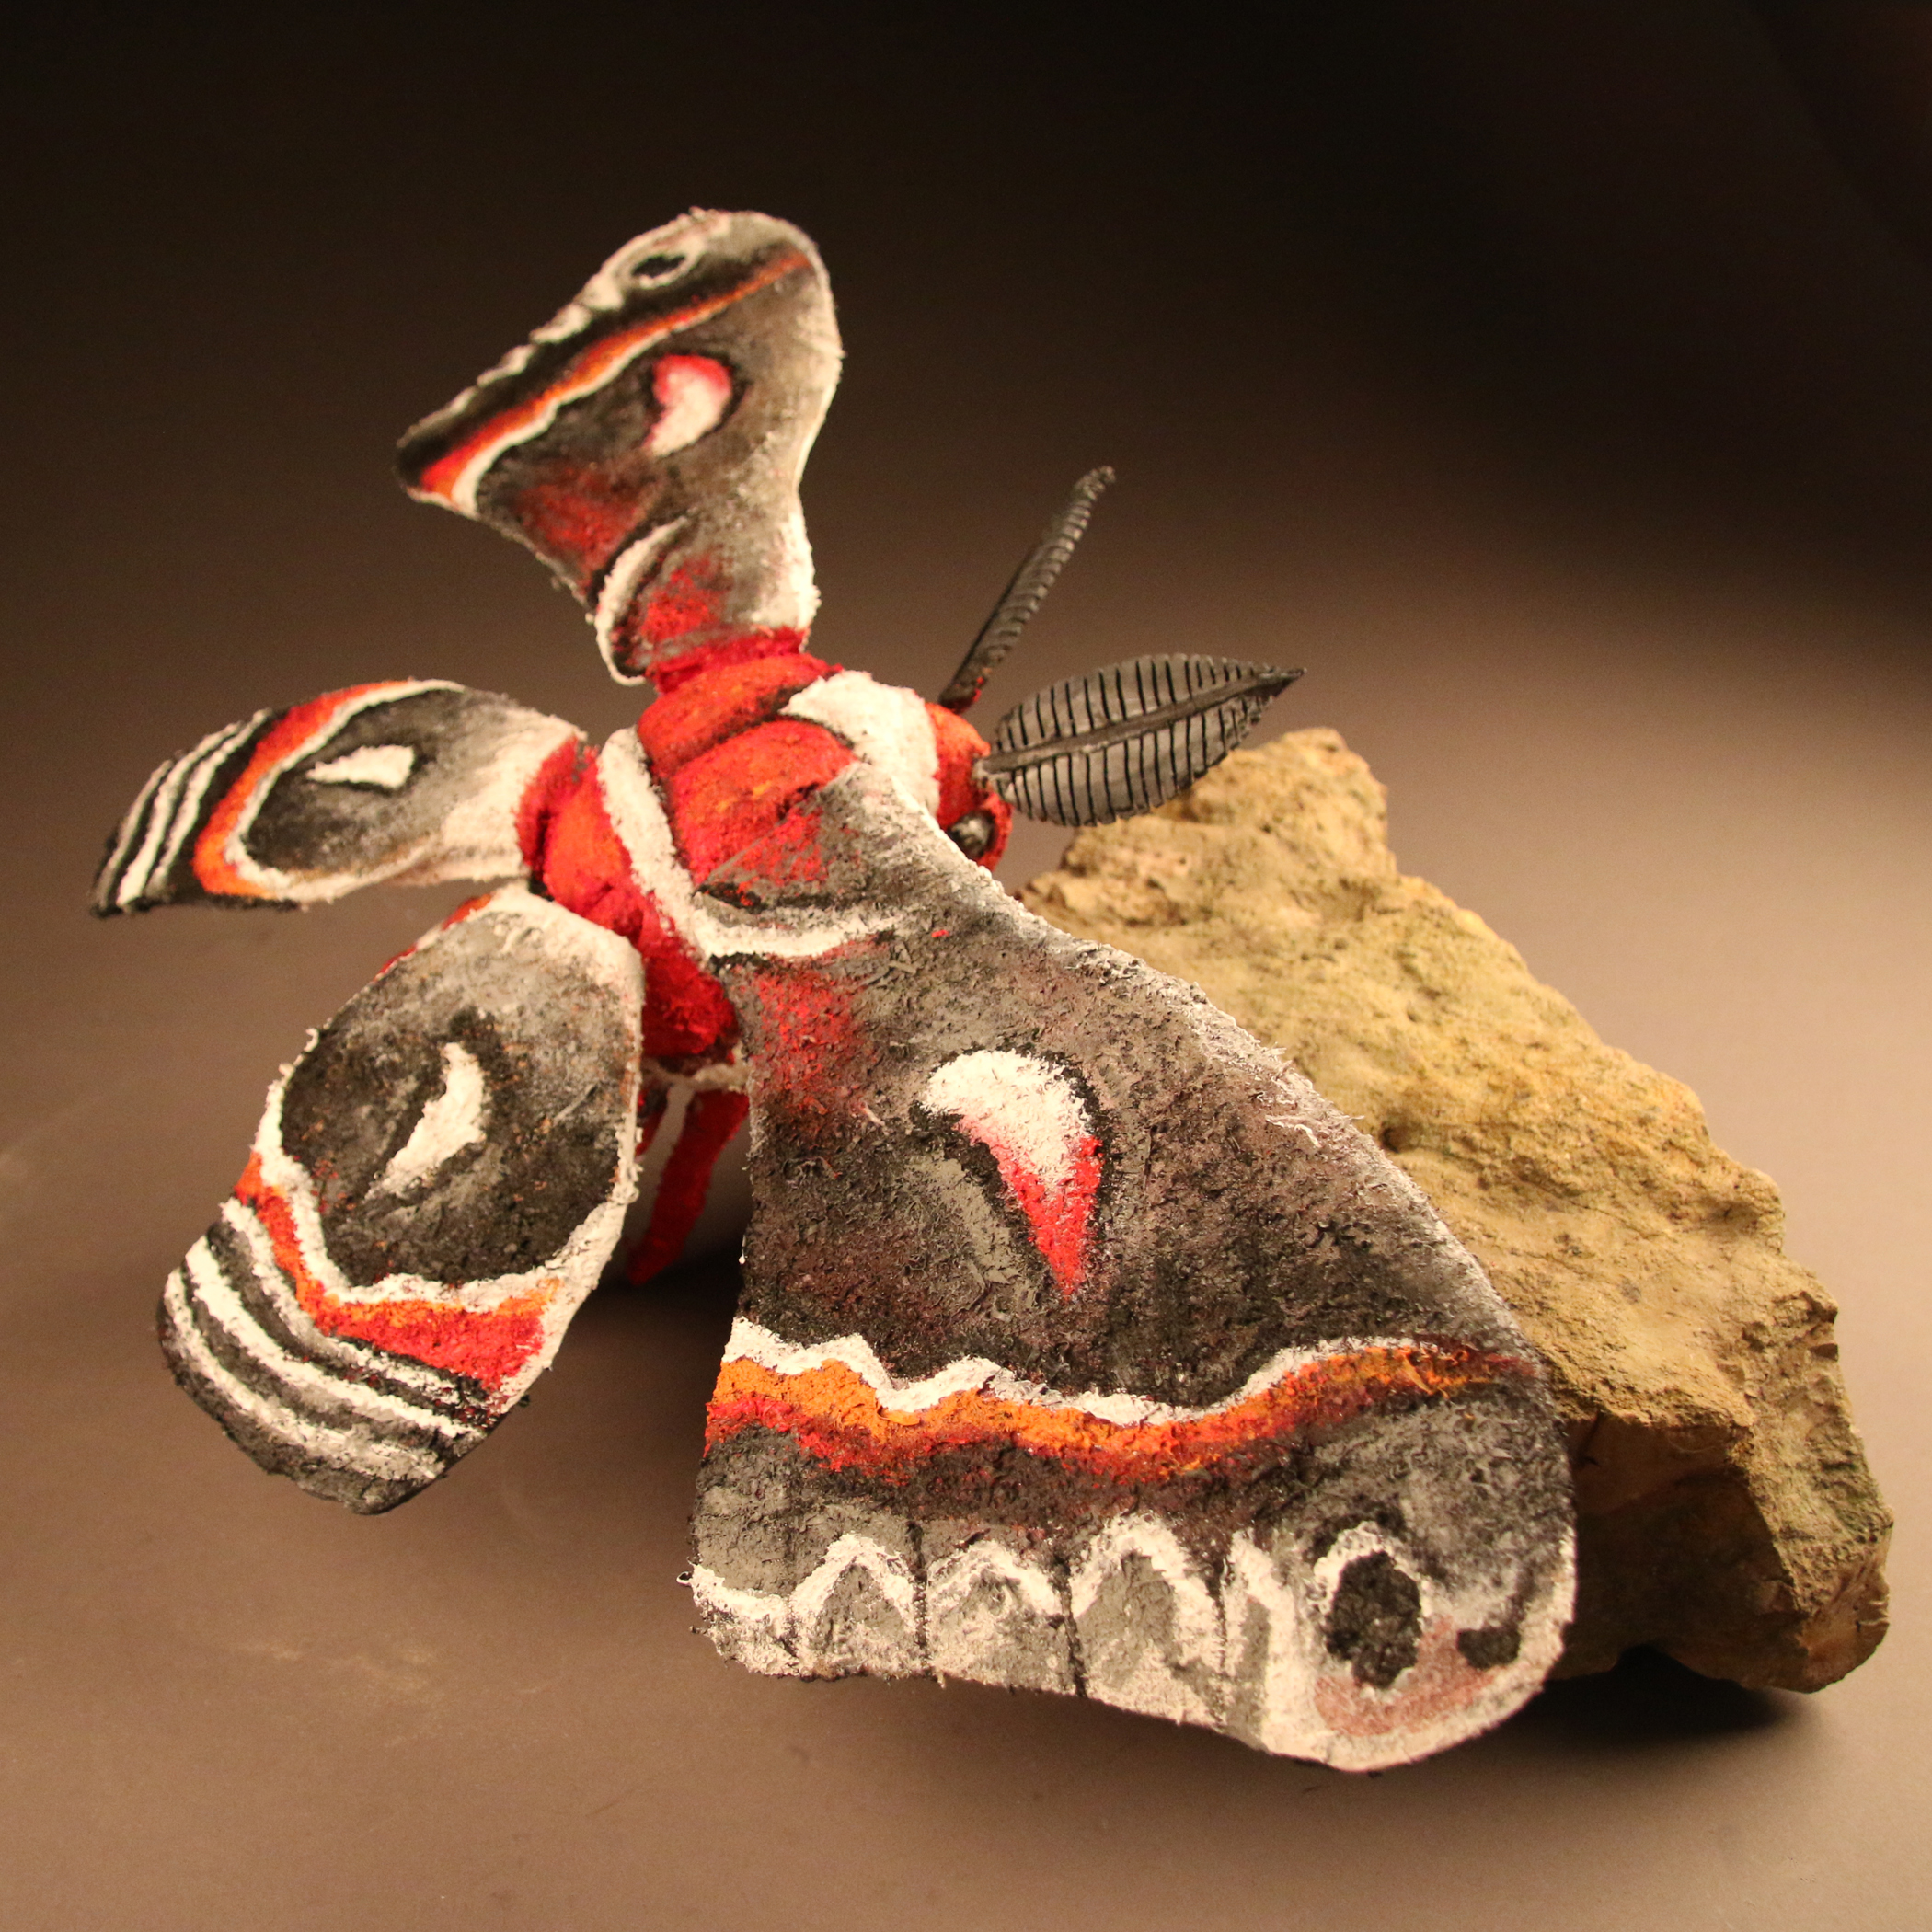
In this project you are to use reclaimed cardboard to render everyday objects. The cardboard structures emphasize the importance of reusing and recycling materials and should provide an inspiring example of creative thought and innovation through repurposing materials.

Mission: (Project Description)

Your mission is to build a mechanical object from the structural and aesthetic qualities of cardboard. Using cardboard, adhesives and possibly some fasteners (such as string, nails and screws) you will be building a 3 dimensional duplication of a mechanical object/device. The finished form should be at least 18 inches in one dimension. Glues are allowed on this project. Tapes or fasteners may be used as well. Hide them and use them strategically, to develop a consistently crafted object. Think: craftsmanship!. Folding, cutting, de-lamination, lamination methods and strategically placing cardboard in a consistent structural method should be a goal. Conservation of materials should be considered as well. Size and weight of the final object is a usual obstacle for sculptors.

Project Description:

Find and choose a mechanical object to model

Begin by planning and drawing: Experiment with cardboard, illustration board, foam core, or thick papers to learn how structures can be built.

Sketchbook Assignment:

Five pages of notes and drawings for this project is required: Draw at least 5 views; a top, a side, a front, a back, a bottom, and perspective views. Details should be considered, as well. One drawing per page. Printed photos can be added as well. You should consider on each of these drawings, details on how you plan to structure or put your piece together. Measuring and recording your dimensions here will also assists in your mission.

Scale:

Drawing and measuring is good research and development. The object you chose will be scaled to at least 18 inches in one dimension. Use “Multiplication” to Scale your object. Example: If your original object is six inches in its longest dimension. You will need to scale the object up three times its original size to achieve the 18 inch finished dimension. Ergo each component part’s measurement will be multiplied by three.

Maquettea:

Small maquettes with paper or illustration board as a starting point will allow you to work out a lot of unforeseen issues when you get to the building stage of your project.

Modular:

If you chose to make your form modular, assembles and disassembles for transport and storage, consider the following. While cutting openings for interlocking card board pieces make the openings large enough so that assemblage and break down are easily done without any damage to your piece.

Production:

The cutting room floor: Your task is to develop a 3-dimensional solution to this problem, with a clean approach to aesthetics (Good Design), good to excellent craftsmanship and a conservative use of materials. THe finished piece must be 18 inches or greater in one of its dimensions. A major goal is to construct the form entirely of cardboard and glue.

NOTE: Please refrain from cutting on the table surfaces. Use a matt of cardboard or other material if you use the table. The floor works well to give one space to work and cut without damaging the table surfaces.

Tools and Materials:

  • Utility Knife/ Exacto knife
  • Tape
  • Wood glue
  • Cardboard
  • Cardboard paper
  • Pencils
  • Rulers and Measuring tapes
  • The Wood shop

Objectives:

  • Material Characteristics:
  • Cardboard: Structural and Aesthetic qualities
  • Method: Planning, Cutting Safely, Building techniques and strategies
  • Sensibility to form: Good design, clean aesthetics
  • Integrity of the artist to their craft

Research/Inspiration:


Project Gallery

Wood Transformation

05MarquezStudent_2013

Premise:

In this project the student is asked to create a sculptural form from wood material. The form does not necessarily need to look like a specific thing. It may be non-objective if desired. If the goal is to create a representation of a real object, a model should be made available. As a basis 2×4 material may be purchased. Students are expected to acquire their own materials for the project.

Scale:

A composition of two feet in one direction is expected.

Sketchbook Assignment:

Sketches of your chosen object should be rendered before and during sculpting. A minimum of four pages should be dedicated to this sketching component. In addition, find four wooden sculptures that inspire you. Printed images of these sculpture or objects should be placed in your sketch book. Your sketch book will be graded along with your project.

Wood Shop:

Before cutting any materials in the wood shop, Make sure all staples and metals are removed from the wood material. Make an extra effort to affirm that no screws or nails remain in purchased or reclaimed wood.

Using the table saw, trim the rounded corners from each 2×4 and other milled wood. This will assist in hiding seems when wood is laminated together.

Each students must use the band saw, reciprocating saw/jig saw, table saw, drill press and compound miter saw in the forms construction. Hand tools should be used as well, files rasp, grinders etc.

Finish:

The forms may be painted. Remember, paint does not necessarily make wood look like something else. If one can see wood grain through the paint then, the form still looks like it’s made from wood. Other surface treatment method may be used with instructor approval.

Glue, nails, screws, or any other means may be used to attach the wood forms together if needed. Challenge the norm, what other material can be used to fasten this material together. Remember, make an extra effort to affirm that no screws or nails remain in wood before sawing the material.

Challenge yourself in how you might subvert the inherent qualities of the material.

What does it take to push something visually beyond what it initially begins as?

Note: Do not use other material to sculpt the object or its components. Focus on utilizing wood as the main source of material for the construction of the form.

Inspiration:

Project Examples: